Pappus chain
In geometry, the Pappus chain is a ring of circles between two tangent circles investigated by Pappus of Alexandria in the 3rd century Anno Domini. This subject piqued my interest following a message on the POVRay newsgroups Pappus Chain from Bald Eagle. A search on the Internet naturally led me to the WIKIPEDIA : Pappus chain.A good way of dealing with this subject is to use inversive geometry. Not knowing enough about this subject, I'm going to use the classic method.
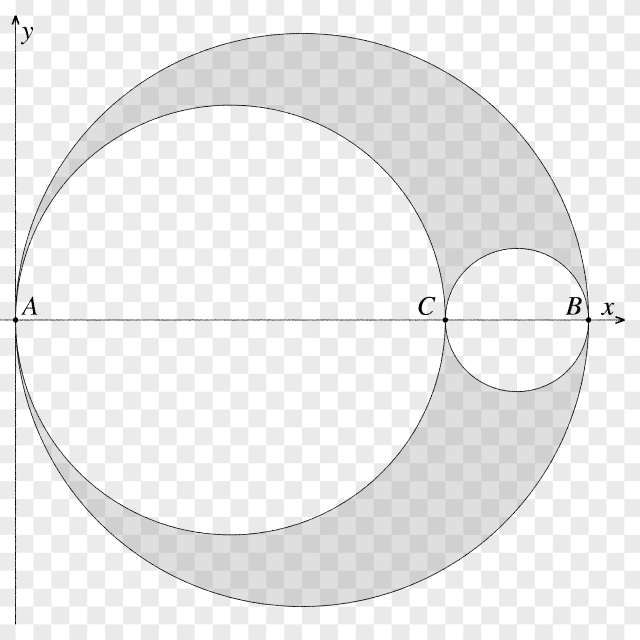
The figure below shows the basic elements I used to build the first 2D chain.
As with Apollonian gasket, I calculate the image size according to the camera settings.
$$SIZE = tan(\frac{CameraAngle}{2})*CameraDistance$$
This allows me to define these two variables :#declare BigRadius = SIZE; // AB*0.50 #declare SmallRadius = SIZE*3/4; // AC*0.50 - Why 3/4 ? why not!Next, we can calculate the position and radius of the 3rd circle (which has CB as its diameter) :
#declare cx = SmallRadius*2 + BigRadius - SmallRadius; // x pos of the center
#declare r = BigRadius - SmallRadius;                  // radius
// Macro that draw a circle
DrawCircle(cx, 0, r)
Now, with this base, we can write a loop that will progressively calculate the position and radius of each circle.
#declare r = SmallRadius/BigRadius;
#declare NthRadius = r;

#declare n = 1;
#while ( NthRadius > MIN_RADIUS )
  #declare divisor = n*n*(1-r)*(1-r)+r;
  #declare xx = 2*BigRadius*r*(1+r)/(2*divisor);
  #declare yy = 2*BigRadius*n*r*(1-r)/divisor;
  #declare NthRadius = 2*BigRadius*r*(1-r)/(2*divisor);

  DrawCircle(xx, +yy, NthRadius)
  DrawCircle(xx, -yy, NthRadius) // by symmetry

  #declare n = n + 1;
#end
The MIN_RADIUS variable, set arbitrarily, is used to terminate the loop. The chain of circles is symmetrical with respect to the x axis, so only one position can be calculated. The DrawCircle ( ) macro draws a circle. It requires four parameters : X and Y coordinates of center, the radius R and the color C. We're still in 2D.
#macro DrawCircle(X, Y, R, C)
  torus { R, rLine pigment { color C } rotate 90*x translate <X,Y,0> }
#end
Let's add a dimension. Instead of drawing circles, we'll draw spheres. We'll just change the macro.#macro DrawCircle(X, Y, R, C)
sphere { <X,R,Y>, R pigment { color C } }
#endChoosing the color NeonPink gives this image (zoom and colors on mouseover) :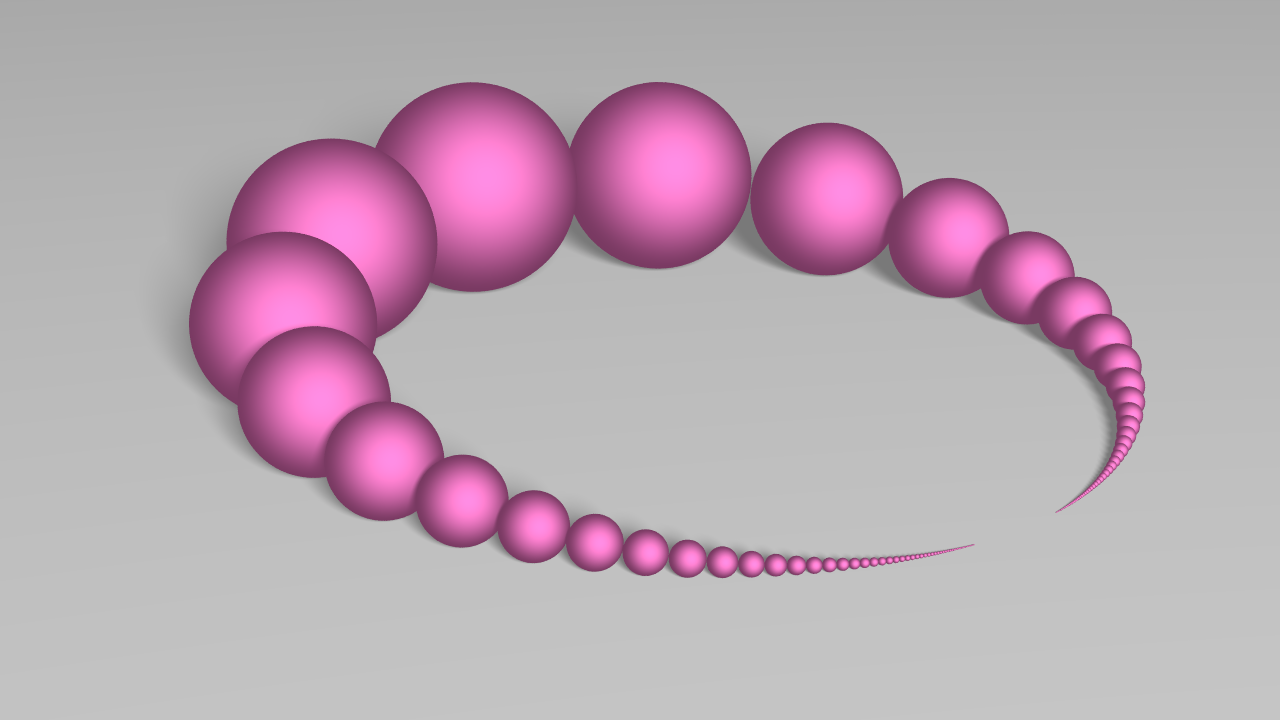
An important note : This is not a fair representation. Just "laying" the spheres on a plane without changing the coordinates "breaks" the chain. The spheres are no longer tangent. As the difference is minimal, it's not noticeable. Not visible, but false.
It's a rather sad picture. First suggestion : grass and stones balls. For stones, POVRay provides two files stones1 and stones2, containing T_Stone* textures. For grass, we have the Gilles Tran MakeGrass macro. Blending the two and you get this image :

Here too, a small problem : a few blades of grass get through the balls. To avoid this, it would be necessary to differentiate between the meadow and the balls before laying the spheres.
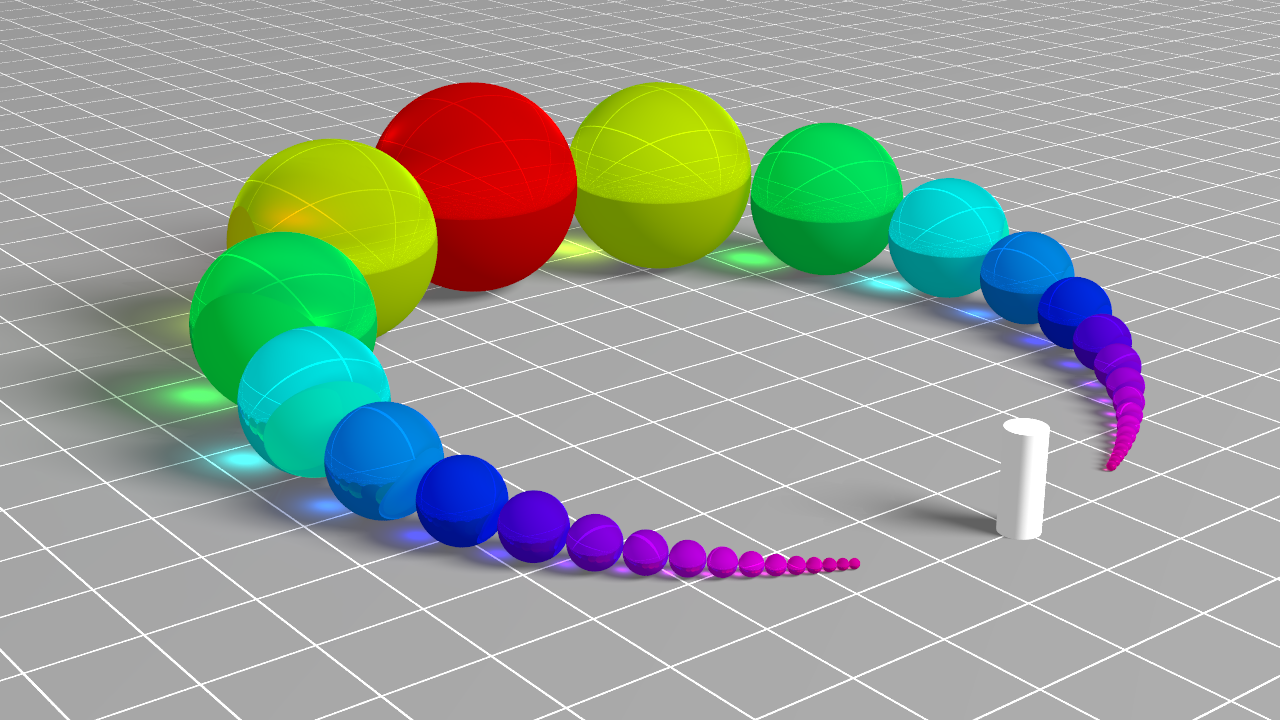
Seconde suggestion : glass with caustics. A little more work. Set the ball hue by determining the angle between the x-axis and the line connecting the center of the great circle and the center of the ball. Make the balls transparent, give them an interior and add photons. I'm not very comfortable with photons, but putting it all together gives :